Mary Berry Cheese Straws Recipe – Easy, Crispy & Cheesy
Mary Berry Cheese Straws Recipe – Crispy, Golden & Cheesy
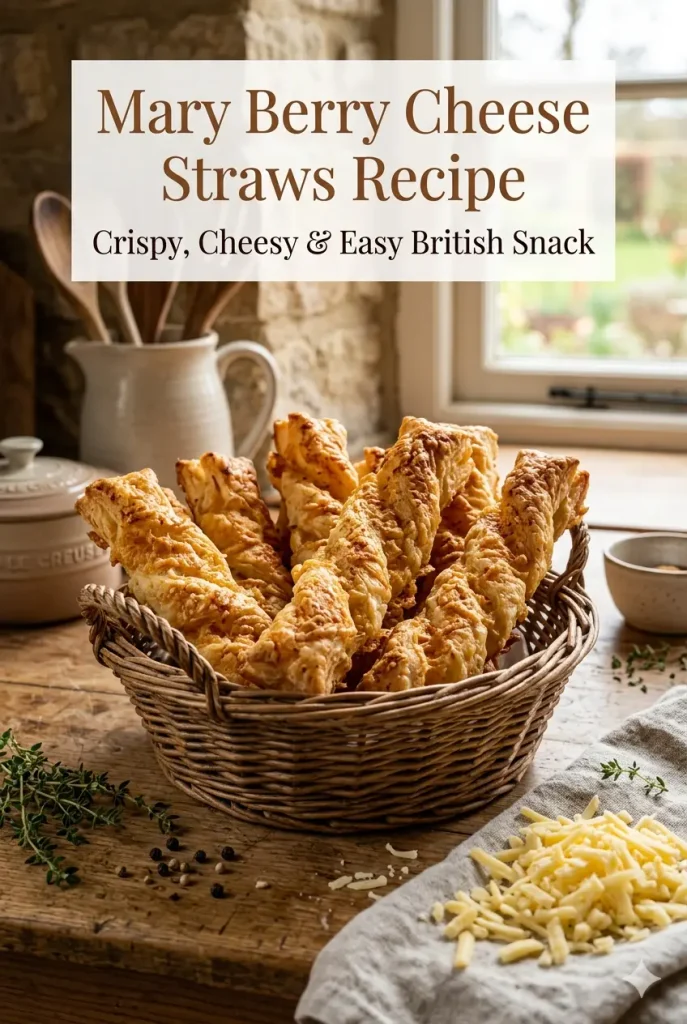
If you are looking for an easy savoury bake that is crispy, buttery and packed with cheese, this Mary Berry cheese straws recipe is a wonderful choice. These homemade cheese straws have a delicious golden finish, a rich cheesy flavour and a light, crisp texture that makes them perfect for parties, afternoon tea, family gatherings or simple snacking.
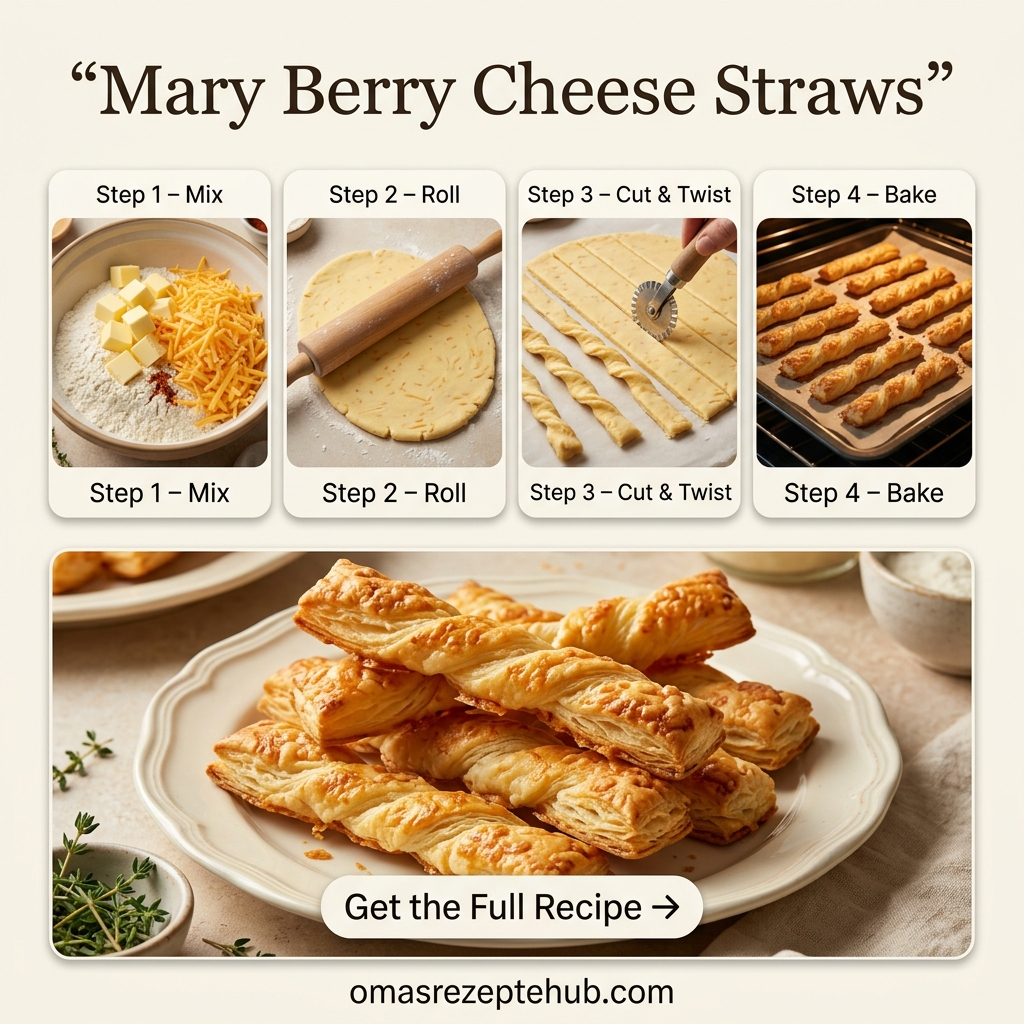
The combination of mature Cheddar, Parmesan, mustard powder and a little cayenne gives these cheese straws plenty of flavour without making them complicated. The semolina also helps give the finished straws a lovely crisp texture.
What Are Mary Berry Cheese Straws?
Mary Berry cheese straws are a classic British savoury bake made with a buttery dough, strong cheese and simple seasoning.
The version associated with Mary Berry’s Somerset Cheddar cheese straws uses cold butter, plain flour, semolina, mature Cheddar, Parmesan, mustard powder, cayenne pepper and egg. The dough is rolled out, cut into thin strips and baked until golden and crisp.
This recipe makes around 50 small cheese straws, making it especially useful when you are preparing food for guests.
Why You Will Love This Mary Berry Cheese Straws Recipe
There are plenty of reasons to try this recipe.
The cheese straws are:
- Crispy and golden
- Rich and cheesy
- Buttery without being greasy
- Easy to prepare
- Great for parties
- Perfect with drinks
- Lovely for afternoon tea
- Suitable for making ahead
- Easy to freeze
- Ideal for Christmas and other celebrations
The mature Cheddar gives the straws a strong cheesy flavour, while Parmesan adds extra savouriness. Mustard powder brings a gentle warmth, and the small amount of cayenne adds another layer of flavour.
Ingredients You Need
You only need a handful of everyday ingredients to make these delicious cheese straws.
| Ingredient | Amount |
|---|---|
| Cold butter | 250g |
| Plain flour | 400g |
| Semolina | 55g |
| Mature Somerset Cheddar | 150g |
| Parmesan | 150g |
| Parmesan for topping | About 4 tbsp |
| Mustard powder | 1 tsp |
| Cayenne pepper | ¼ tsp |
| Egg | 1 |
| Milk | A little for brushing |
| Salt | A small pinch |
Why Cold Butter Is Important
Cold butter is very important when making these cheese straws.
When the butter is kept cold, it helps create a light and crisp texture during baking. If the butter becomes too warm before the dough goes into the oven, the cheese straws can lose some of their shape and become heavier.
For the best result, cut the butter into cubes and keep it chilled until you are ready to use it.
Why Use Mature Cheddar?
Mature Cheddar is ideal because it has a stronger flavour than mild Cheddar.
Cheese is one of the main flavours in this recipe, so using a good mature cheese means you do not need to add lots of extra seasoning.
You can use extra-mature Cheddar if you enjoy a stronger cheese flavour.
What Does the Parmesan Do?
Parmesan adds a salty, savoury flavour that works beautifully with mature Cheddar.
Some Parmesan is mixed into the dough, while a little more is sprinkled over the top before baking. This helps create a delicious golden and savoury finish.
What Does Semolina Do?
Semolina is a useful ingredient in this recipe because it helps give the cheese straws a crisp texture.
It also adds a slightly different texture to the dough compared with using plain flour alone.
If you have semolina available, it is worth using it for this recipe.
How to Make Mary Berry Cheese Straws
Preheat the Oven
Preheat your oven to 200°C, Fan 180°C, Gas Mark 6.
Line two large baking trays with non-stick baking paper.
Make sure the oven is fully heated before the cheese straws go inside.
Make the Cheese Straw Dough
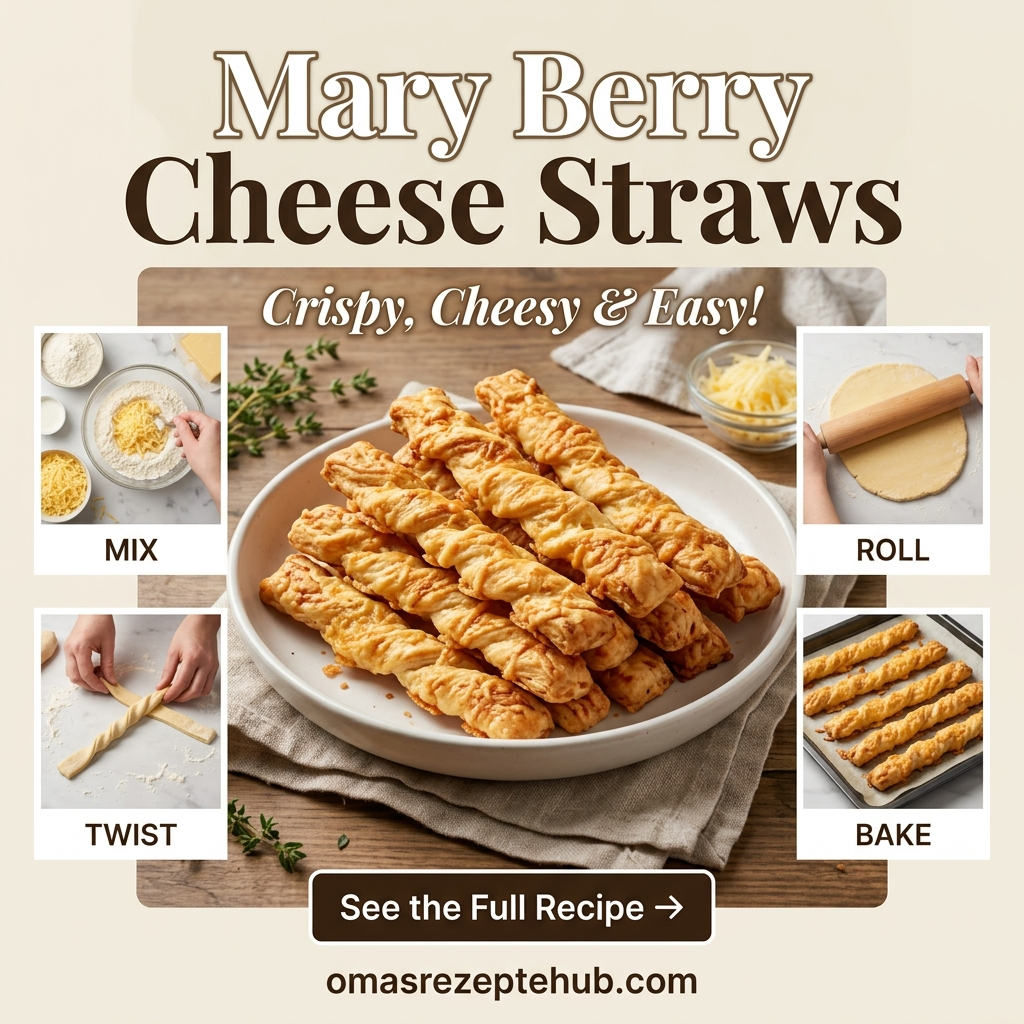
Place the cold cubed butter, semolina, plain flour, mustard powder, cayenne pepper and a little salt into a food processor.
Pulse the mixture until it resembles breadcrumbs.
You do not want to process it for too long. The mixture only needs to reach a fine breadcrumb-like texture before you add the cheese and egg.
Add the Cheese and Egg
Add the grated mature Cheddar, grated Parmesan and beaten egg.
Pulse again briefly until the mixture comes together and forms a dough.
Try not to overwork the dough. Once it holds together, stop mixing.
Overworking can make the finished cheese straws less delicate.
Divide the Dough
Remove the dough from the food processor and divide it into two equal pieces.
Place each piece on a lightly floured work surface.
Shape each piece gently into a rectangle with your hands.
Roll Out the Dough
Roll each piece into a rectangle approximately 46cm x 16cm and about 8mm thick.
Try to keep the thickness even across the whole rectangle.
If some parts are much thinner than others, those pieces may brown more quickly in the oven.
Add the Parmesan Topping
Brush a small amount of milk over the surface of the dough.
Sprinkle finely grated Parmesan over the top.
Try to spread the Parmesan evenly so every cheese straw gets a little topping.
Cut Into Strips
Using a sharp knife or pizza cutter, cut each rectangle into approximately 25 strips.
You can make the strips longer or shorter depending on how you want to serve them.
Carefully transfer the strips to the prepared baking trays.
Leave a little space between them so they can bake evenly.
Bake the Cheese Straws
Place the trays in the preheated oven.
Bake for approximately 18 minutes, or until the cheese straws are golden brown and crisp.
Keep an eye on them towards the end because oven temperatures can vary.
Let Them Cool
When the cheese straws are ready, remove the trays from the oven.
Leave the straws on the baking trays until they have cooled and become firm enough to handle.
They become crisper as they cool, so do not worry if they seem slightly soft immediately after baking.
What Makes These Cheese Straws So Crispy?
There are several things that help create the lovely crisp texture.
First, the butter should be cold.
Second, the dough should not be overworked.
Third, the dough should be rolled to an even thickness.
Finally, the cheese straws should be baked until properly golden rather than removed too early.
The semolina also contributes to the crisp texture.
Common Mistakes to Avoid
Using Warm Butter
Soft or warm butter can make the dough difficult to handle and may affect the final texture.
Keep your butter cold until you are ready to make the dough.
Overworking the Dough
Do not continue mixing once the dough has come together.
Too much mixing can make the cheese straws tougher than you want.
Rolling the Dough Too Thick
If the dough is too thick, the centre may not become properly crisp before the outside becomes golden.
Try to keep the dough around 8mm thick for this style of cheese straw.
Cutting Uneven Strips
Very thin strips can brown faster than thick ones.
Try to make the strips as similar in size as possible so they cook at the same rate.
Putting Too Many on One Tray
Avoid overcrowding the baking tray.
Give the cheese straws a little room so hot air can circulate around them.
Can You Make Cheese Straws Without Cayenne?
Yes.
The cayenne pepper adds a gentle warmth, but you can leave it out if you prefer a milder flavour.
You can also replace it with a small amount of paprika if you want a softer, slightly sweeter seasoning.
Can You Use a Different Cheese?
Yes, although mature Cheddar gives the classic strong flavour.
You can experiment with other hard cheeses depending on what you have available.
Good choices include:
- Extra-mature Cheddar
- Red Leicester
- Parmesan
- Pecorino
- Gruyère
A combination of two cheeses can also give the cheese straws a deeper flavour.
Can You Make These Cheese Straws Without a Food Processor?
Yes.
If you do not have a food processor, you can make the dough by hand.
Rub the cold butter into the flour and semolina using your fingertips until the mixture resembles breadcrumbs.
Then mix in the mustard powder, cayenne, grated cheese and egg.
Bring everything together gently until you have a dough.
The important thing is not to overwork it.
How to Serve Mary Berry Cheese Straws
These cheese straws are extremely versatile.
You can serve them:
- With afternoon tea
- As a party appetiser
- With pre-dinner drinks
- As a Christmas snack
- With soup
- On a buffet table
- With cheese and chutney
- At family gatherings
- As a simple afternoon snack
They are particularly good alongside a strong chutney because the sweet and sharp flavours balance the salty cheese.
Cheese Straws for Parties
If you are preparing food for a party, cheese straws are a very useful make-ahead option.
They are easy to arrange on a serving plate and can be eaten without cutlery.
You can make them slightly shorter for a buffet or party table.
For a more decorative look, you can also twist the strips gently before placing them on the baking tray.
Cheese Straws for Christmas
These homemade cheese straws are also perfect for Christmas.
They can be served as part of a festive starter selection or placed on a snack table for guests to enjoy throughout the day.
You can make smaller cheese straws for Christmas parties and serve them with chutney, crackers and other savoury nibbles.
What to Serve With Cheese Straws
There are many delicious pairings for homemade cheese straws.
Try them with:
- Apple chutney
- Onion chutney
- Tomato chutney
- Caramelised onion dip
- Cream cheese
- Soup
- Fresh salad
- Cheese boards
- Olives
A homemade apple chutney is particularly good because its sweet and tangy flavour contrasts nicely with the salty cheese.
How to Store Cheese Straws
Allow the cheese straws to cool completely before storing them.
Place them in an airtight container and keep them in a cool, dry place.
Keeping moisture away from the cheese straws is important because moisture can make them lose their crisp texture.
Can You Freeze Mary Berry Cheese Straws?
Yes, cheese straws can be prepared ahead and frozen.
Allow baked cheese straws to cool completely before freezing them.
Place them into a suitable freezer container or freezer bag and separate layers if necessary.
When you want to serve them, allow them to thaw and refresh them briefly in a warm oven if needed.
How to Keep Cheese Straws Crisp
The main enemy of crispy cheese straws is moisture.
Always cool them completely before putting them into an airtight container.
Do not store warm cheese straws because trapped steam can make them soft.
If they lose some of their crispness, a few minutes in a warm oven can help refresh them.
Can You Make the Dough Ahead?
Yes.
The dough can be prepared ahead of time and kept chilled before rolling and baking.
This can be useful when you are preparing food for a party or special occasion.
Keep the dough properly wrapped and chilled until you are ready to use it.
My Best Tips for Perfect Cheese Straws
Keep the butter cold.
Use mature Cheddar for a stronger flavour.
Do not overwork the dough.
Use freshly grated cheese where possible.
Roll the dough evenly.
Do not overcrowd the baking trays.
Watch the cheese straws towards the end of baking.
Allow them to cool before moving them too much.
Store them in an airtight container once completely cool.
Why This Recipe Is Great for Beginners
Although homemade cheese straws can look a little fancy, the actual method is quite simple.
The food processor makes the dough quick to prepare, and there are no complicated decorating techniques.
The most important things are keeping the butter cold, avoiding overworking the dough and baking the straws until golden and crisp.
Once you understand these simple steps, you can make them confidently.
Frequently Asked Questions About Mary Berry Cheese Straws
How many cheese straws does this recipe make?
This recipe makes approximately 50 cheese straws when the dough is divided into two rectangles and cut into around 25 strips each.
Can I use mild Cheddar?
Yes, but mature or extra-mature Cheddar will give you a much stronger cheese flavour.
Can I leave out the mustard powder?
Yes. The mustard powder adds extra savoury depth, but you can leave it out if you do not have any.
Can I leave out the cayenne pepper?
Yes. Simply leave it out for a milder cheese straw.
Why are my cheese straws soft?
They may need a little more baking, or they may have been stored before cooling completely.
Allow them to cool fully before storing them.
Why did my cheese straws spread?
Warm butter can cause the dough to lose its shape during baking. Keeping the dough and butter cool helps the straws hold their shape.
Can I use Parmesan instead of Cheddar?
You can use Parmesan as part of the cheese mixture, but mature Cheddar gives the recipe a lovely rich and familiar flavour.
Can I make smaller cheese straws?
Yes. Simply cut the dough into shorter strips. Smaller cheese straws are especially useful for children’s parties and buffets.
Are cheese straws good for afternoon tea?
Yes. Homemade cheese straws make a lovely savoury addition to afternoon tea, especially when served alongside sandwiches, scones and chutney.
Final Thoughts on Mary Berry Cheese Straws Recipe
This Mary Berry cheese straws recipe is a brilliant choice when you want a homemade savoury snack that looks impressive but is actually quite simple to prepare.
The combination of cold butter, mature Cheddar, Parmesan, semolina and gentle seasoning creates crispy, golden and deeply savoury cheese straws that are difficult to resist.
They are perfect for afternoon tea, parties, Christmas gatherings, buffets or simply keeping in the kitchen for a homemade snack.
For the best results, keep your butter cold, handle the dough gently and allow the finished cheese straws to cool properly before serving. Once you have made them successfully, you may find yourself making them again and again.